Test automation with CODECEPTJSM
Most people are lazy, and testers are no exception. It’s one of the main reasons automated end-to-end and regression tests exist. But there are dozens of different automation tools in every thinkable programming language (however… I would pay to see someone port Selenium to Fortran), so which one do you pick? In this blog I will make a case for CodeceptJS and offer a short introduction.
The basics
Before starting with test automation, it’s advisable to spend some time getting familiar with the basics of web applications. How are they built? And how does every part communicate with each other?
The best way to learn this is to follow an introductory course in HTML and CSS. There are a lot of them on the internet, but I would suggest the Introduction to Basic HTML & HTML5 and Introduction to Basic CSS from FreeCodeCamp. This will help you get comfortable with the Document Object Model DOM and finding the unique elements for your tests.
After that, you’ll need some familiarity with JavaScript. Both Codecademyand FreeCodeCamp offer interactive introductory courses on the language, but you could also take a look at Eloquent JavaScript, a nice book with integrated sandbox to run your code.
After this, be sure to check out the possibilities of your browser's developer tools. Especially the Page Inspector is an especially indispensable tool, but also the Console can really help you to check the uniqueness of the elements.
Why codeceptjs?
Anyone in the last year who had a conversation with me about test automation will have heard me preach the gospel on Codecept. In my previous blog, I already wrote a bit about why I think automation tools in JavaScript are the way to go. Let me now explain why Codecept should be the first end-to-end, or e2e, testing tool to consider.
1. Multiple testing tools in one
Codecept itself is not so much a testing tool as a wrap around multiple testing tools. This means that with CodeceptJS you can pick between WebDriverIO, Protactor, Nightmare, Appium, Puppeteer and even Playwright and use the same script to test on all of those. You can even test your REST Api with Axios and integrate this with your e2e tests.
2. Easy to set up
As the next paragraph will show, you get a basic test running in around five minutes, and it's quite easy. This makes it ideal for test automation novices and means you don’t have to spend a lot of resources in setting up a test framework in small projects.
3. Expandable
In case CodeceptJS is missing that one thing that’s absolutely, positively necessary to run your e2e tests, it’s very easy to create a helper class to do just that.
Installing codeceptjs
Now that you know why you should start with CodeceptJS, let’s get started. First of all, make sure you have NPM installed. You can check this with
in your terminal. If npm is an unknown command, it means you need to install NPM. After that, from the directory you want to create the tests in run the following command:
This will install both CodeceptJS and Puppeteer.
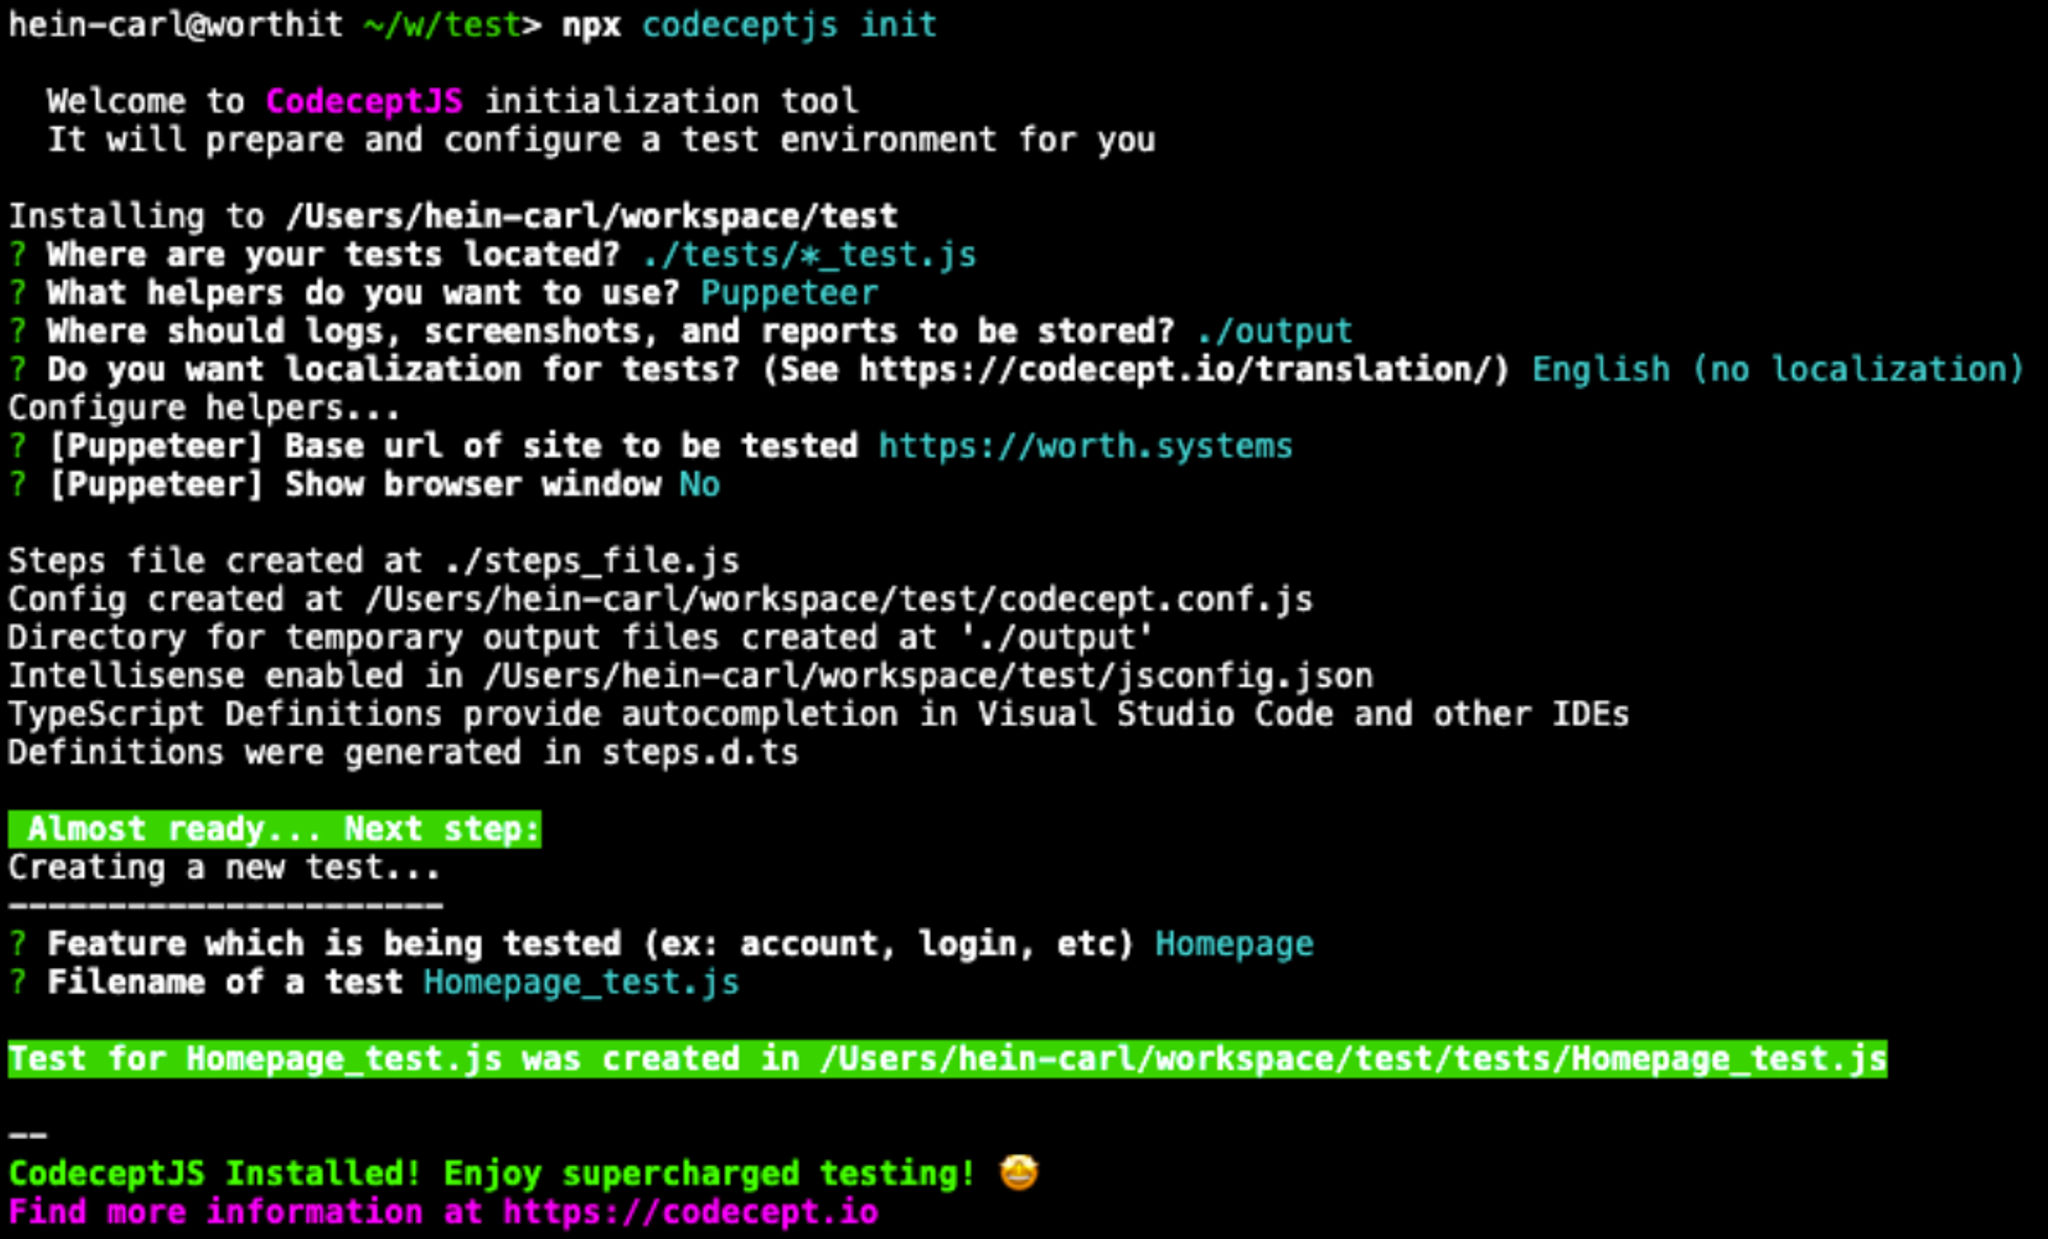
After you’ve installed Codecept, you can set it up for your first test by following the steps as described in their own Quickstart-guide. You just have to answer a few questions and Codecept will set everything up for you:
In this case I pointed Codecept to create a special tests-folder for all the tests and an output-folder for the test attributes like screenshots of failed tests, logs and test reports. I also created a place for custom steps that we will use later on. The base url and browser information are settings that will be used for the tests. You can edit these, and all other ones, in your codecept.conf.js-file.
Writing your first test
During the init script Codecept also asked about the feature and filename of a test. They created your first test for you! Open the tests-folder to take a look.
This is your first test! Try running it with:
You’ll see the console give a message that the test was successful. Because the test is empty, nothing else is happening. So, let’s add some commands:
There you have a simple test script. Now run
again. You’ll see a lot more happening than last time. You’ve just run your first test! Take a look at the reference list to see all the possible methods that you can use.
Custom steps
When expanding your tests you encounter steps, like logins, that you are repeating over and over. Instead of copy-pasting these steps every time, you can easily move them to Codecept’s custom steps file. During the initial setup we had already created the steps.js-file. From our current test, it would make sense to move the steps that handle the cookie banner to a seperate function, because I expect we will be using it in more tests. Follow the comments in the steps.js-file and move the steps concerning the cookie banner to the steps.js-file. When you are done, it should look like something like this:
You can now use the clickCookieButton()-function in your tests, which should look like this:
Conclusion
There you go! Your first test in Codecept. Hopefully this is enough of an explanation to get you started. And hopefully you are convinced to start using it as well. The repository is also visible on GitHub with all the used examples, so if you have more questions you can also ask them there.
What is your situation?
Let's connect and explore how we'd make your initiative more successful. What describes your situation best?